| Cooling your Athlon Thunderbird (for the non-overclocker) |
|
Table Of Contents
|
|
Brief Introduction: I recently built a new system for personal use. While I had been well aware of the heat problems associated with the new high-speed AMD and Intel CPUs, I never could have anticipated the severe heat problems that I would run into with my brand new out-of-the-box Thunderbird. I have done much research on the subject of CPU cooling since first building my new machine, and I decided to post what I discovered on the web. |
| First, the specs: |
| Part | Manufacturer | Model | Specification | Info Link |
| Processor | AMD | Athlon/Thunderbird | 1.33 GHz, 133 MHz x2 FSB |  |
| Heat Sink | CoolerMaster | EP5 6I11-A1 | Aluminum base, 4800 RPM Fan, AMD Recommended |  |
| Mother Board | Asus | A7M266 | AMD-760(761) Chipset, BIOS Rev. 1005 | 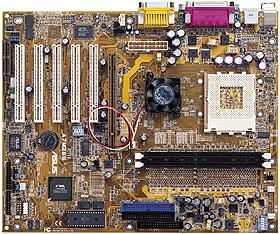 |
| Memory | Micron | MT16VDDT3264AG-265A1 | 768MB (256MB+512MB) PC2100 DDR-SDRAM |  |
| Chassis | Palo Alto | PA 810 Server Chassis | ATX, 120mm exhaust fan, 92mm intake fan, 300w AMD approved Power-supply |  |
| Chassis Exhaust Fan | Delta | WFB1212M | 120mm | 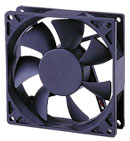 |
| Video | Creative | Gainward CARDEXpert Geforce2 Pro/450, AGP 4x | 64 MB, GeForce 2 GTS Pro, 4.5ns RAM |  |
| CD-ROM Drive | Creative Reader/Sony Burner | 52x CD Reader/24x/10x/40x Burner | 52x, 7600 KB/sec, 90ms, EIDE |  |
| Hard Drive | IBM | Deskstar 60GXP | 60 GB, 7200 RPM, Ultra-100 IDE | 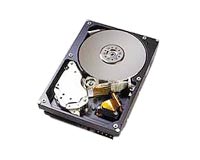 |
|
So you can probably see by the hardware specs that this machine requires some pretty heavy cooling in order to
maintain an acceptable level of stability I had to do alot of research to come up with a solution, and I
decided to put all of the data that I collected in one place to make it easier for the next guy.
|
|
Problem background: It took me just under an hour to build the entire machine. The original case was one that I had previously been using for a P-III 600 machine. It had a single front intake fan, and a 250 Watt power supply with 80mm exhaust fan. The case had worked fine with the old setup, and, in fact, that box with the TYAN S1854 Trinity 400 Motherboard was the most stable machine I've ever built. So, there was my first mistake. The heat generated by a P-III 600 MHz doesn't even come close to that of an Athlon 1.33 GHz. The board, chip and memory are all meant to run at a 133x2 MHz DDR bus. But I couldn't even install Windows 98 unless I lowered the FSB to 100 MHz AND took off the side panels of the chassis. At 133 MHz, the BIOS showed the temperature of the CPU to be approaching 58°C with one panel on. So I lowered the bus, opened the chassis and continued installing Windows 98. Once Windows was installed, I immediately began testing the stability of the board at different clock-rates, and I found that I could run the FSB at a maximum of 124 MHz (248/2), and even then, only with the chassis wide-open. Though, I never tested this speed with (e.g.) Quake III, I am sure it would have frozen before the first map finished loading. This of course is by no means sufficient. First of all, I hate fan noise. I want my computer to be as quiet as possible (and VERY quiet IS possible as you shall see), so I must close the case. Secondly, I spent quite a large chunk of cash on my 266 MHz FSB total solution, and damn it, I wasn't settling for anything less than my money's worth. I took the following steps to lower my CPU temperature. |
||||
|
Solutions to the over-heating problem:
Solution #1 (-6°C): Change thermal conductor between heatsink and CPU I knew immediately that the problem was due to overheating, and not to (e.g) bad stability at Higher clock-rates. Asus is one the most highly-regarded motherboard manufacturers in the industry right now, and I trust their engineering capabilities. On the other-hand, with the ensuing CPU clock-speed war between AMD and Intel, I cannot say the same about the manufacturer of my CPU. But I digress... One of biggest causes of Processor over-heating is a poorly situated heatsink. This includes not only misplacement of the CPU, but also using the wrong type of conductor between the Heatsink and CPU. Most heatsinks, including mine, come preloaded with a strip of thermal tape. The conductivity of thermal tape is fairly low compared to that of Silcon Thermal Grease or Silver Paste. This can make a huge difference in the heat-transfer from the CPU to the heatsink. In my case, switching from the thermal tape which came on my AMD Recommended CoolerMaster heatsink to very generic, Silicon-based Nickel-Oxide Thermal Grease (Check local Radio-Shack) lowered my CPU Temperature to about 52°C with the case closed. This was cool enough to keep Windows from crashing, but with even a moderate amount of general use, the temperature would increase to about 55°C. At that temperature, a reboot is impossible, so I would have to shut down the machine, let it cool off, and then do a "cold" boot. ***NOTE: Shame on AMD for not requiring that AMD-approved heatsinks at least come with the generic silicon-based grease. |
||||
|
Solution #2, -3°C: Ensure proper airflow into and out of chassis
While researching CPU cooling, I came across AMDs Chassis airflow specs on their website. I had also been reading elsewhere about obtaining adequate cooling through good chassis design. AMD recommends an 88mm exhaust fan to the rear of the chassis underneath the power-supply. They do not recommend an intake fan in the font of the case, because during their testing it sometimes did nothing but circulate hot air around the case while preventing cooler outside air from entering the case. Since the case that I was using at the time only had an 80mm front intake fan, I decided to simulate the proper airflow characteristic of a well-designed case using what I had. The first thing I did was move all cables out of the center of the case. I stuffed IDE and floppy cables into the middle bays of the case, and I routed the power cables around the inside perimeter of the case to allow proper airflow directly from the front to the back of the case. I then closed all of the open PCI slots (I had previously kept them open hoping for better ventilation), and I taped off a long string of air vent holes at the back of the chassis. Then I turned on the box, again with the side panels on, and measured the temperature. The CPU was now running 3 to 4 degrees cooler than it did with all of the extra ventilation. I could now run most major apps with MP3's playing in the background without the fear of a system crash. The conclusion: proper airflow design works. This does not necessarily defy all logic however. The idea is that with proper airflow, you get one continuous stream of cool air coming in through the front of the case, past the drives and the first half of the motherboard. At the end of the stream, the air quickly heats up as it passes over the processor, but then it is whisked out the back of the case by the power supply and exhaust fan. One entry point for cool air, one exit point for warm air. Very logical indeed. |
||||
|
Solution #3, -4°C: Implement Software CPU Cooling
You may have heard about "software CPU cooling" from working with Linux. Most Linux O/S varieties have a single O/S thread dedicating to executing the Intel Processor's HLT instruction. During normal operation, the CPU spends much of it's time in an "inactive" state, for example while waiting for some input from the keyboard or mouse. Right now, for instance, you are reading this guide, and chances are your computer is performing little if any calculations. Calling the HLT instruction basically tells the CPU "don't do ANYTHING" for one cycle, this effectively "shuts off" your CPU for one cycle which over time will lead to a cooler CPU. The effects of monitoring the CPU's workload and calling the HLT instruction when it is idle is often called Software CPU Cooling or or just Software cooling. Since software cooling is not an inherent feature of Windows 98 (no big surprise there), I downloaded a third-party shareware package called CPU idle. I later found that the Asus Probe Motherboard monitoring software which I was using to measure my CPU's temperature, has this functionality built in. The resulting temperature decrease ranged from 3°C - 5°C. That's -3° when I was using the computer for mundane tasks such as browsing the web and playing MP3s, and about -5° when I was doing nothing. In fact, you can literally watch your CPU temperature decrease over the course of several minutes after first enabling this software. |
||||
|
Solution #4, -2°C: Increase airflow through better fans (see sidebar as well)
I now had a pretty stable machine running at about 46°C, and I could do alot with it. But I still wouldn't dare run a high-end CPU cycle-eating 3D renderer, or game. If I put the CPU to full use, the software cooling would have no effect, and my machine would surely freeze. So I continued on reading webpage after webpage, and magazine after magazine until one day at work, a co-worker pointed out to me a particular Gateway 2000 server which had a very interesting configuration. Looking at the Server's innards, I found that the case was very roomy and definately had adequate airflow. The hard-drives were rotated 90° horizontally allowing easy access to the cables AND keeping the cables out of the way of the chassis air stream. There was a huge 92mm fan in the front of the case, blowing directly over the hard drive bays, and there was a MONUMENTAL 120mm rear exhaust fan just below the power-supply. The power-supply had the air intake on the bottom, so that hot air is drawn straight off of the processor and out the rear of the case. The Server is a Gateway 6400 Server with Dual P-III 1 GHz processors, and the entire chassis was obviously designed from the ground up to be as cool AND quiet as possible, as with the case closed, you would never imagine that there are 212mm of total fan diameter under the hood. I looked up the model numbers of the fans on the web. The Delta fans used on the Gateway server (and now on my PC) have excellent throughput with low RPMs and thus low noise. Their large area and good design allow them to move alot of air without spinning too fast, and they come with an extra wire for use with an AMD Motherboard's Fan RPM sensor. After reading the specs of the Delta fans, I concluded that not all fans are created equal (see the sidebar "Fan Throughput in a Nutshell"). I replaced my 2-sleeve-bearing low-RPM front intake fan, with a slightly higher-RPM, ball-bearing fan. Although the new fan is the same size as the old one, it comes with a heat-sensing diode attached to the end of two long wires, and the fan actually speeds up when it senses high-temperatures, and slows down when the CPU is relatively cool. I taped the diode right to the side of the CPU heatsink with the head resting just short of the CPU. This way the fan will speed up and slow down almost in conjunction with the CPU temperature and not with the ambient chassis temperature. The running temperature of my CPU dropped another 2° to 44°C. |
||||
|
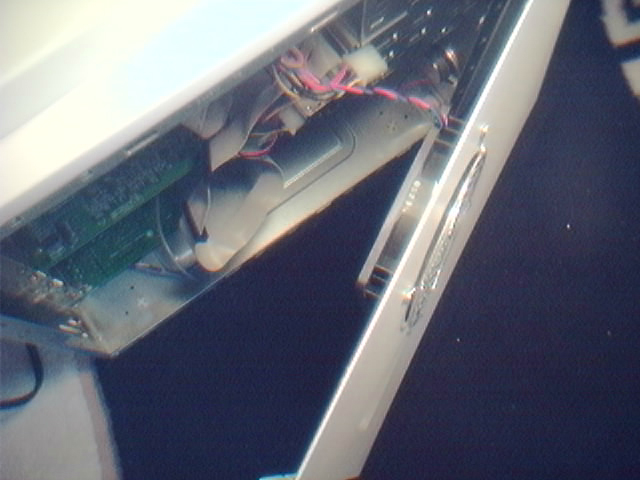
Solution #5, -6°C: Case mods for better cooling
By this time I was just short of an expert on CPU cooling. I think I have read every major article and white paper on chassis airflow, fan and heatsink design, thermo-dynamics, and enough material to cover 1/3 of a Chemistry course on the heat-distribution and dissipation of various materials. However, after all of that, at 44°C, my CPU still was not cool enough for me. I decided to spend the money on a new case. For two weeks, I read every review that I could find on every chassis which some basic requirements: 88mm (or greater) rear exhaust fan, 3x5.25" and 4x3.5" drive bays, and a 300 Watt power supply with bottom air intake. I narrowed it down to just a handful, and finally decided on the Palo Alto PA-810 Server Chassis (see the above component list). I like the case because of the excellent cooling design with a 120mm rear exhaust fan, 92mm front intake fan and optional drive cage which is rotated 90° horizontally for easy access and... Sound familiar? That's because the PA-810 Server Chassis is the same chassis that Gateway uses in their 6400 Server series. That's right Palo Alto fitted them with a custom bezel and shipped 'em out as is. I have ordered my new chassis, but I am still waiting for it to get here. Therefore, I have no benchmarks on it's cooling effect on my system. However, I am not going to wait forever to start using my system for hard-core tasks. I decided that since I have a new case on the way, I can experiment with the old one a bit to see if I can get it to run a bit cooler. I decided that there were two things that I wanted to change. First, I wanted to add a second case fan. Since there was not enough room in the rear of the case, I cut a hole in the side panel just above the CPU, and mounted my old sleeve-bearing fan on the outside of the door facing in. The result was an astounding 5°C drop in temperature. That fan is not very loud, so even on the outside of the case, the noise is not very noticable. BTW, I mounted the fan on the outside of the case because I am without the proper tools. I recommend you mount the fan on the inside of the case and put some sort of fan guard to prevent accidental damage to the fan or motherboard. I also wanted to modify the front intake fan a bit. There was a spacer of about 1¼" between the fan and the front of the case. This meant that the fan was not only drawing cool air in from the front of the case, but it was also recirculating warm air from inside the chassis. Removing this useless spacer with a hammer, tinsnips, and screwdriver led to a small but noticeable 1°C drop in CPU temperature and about a 2°C drop in chassis temperature. |
||||
|
Total solution, -20°C: Conclusive evidence that the Athlon 1.33 GHz can be made to run stable
|
||||
| 8/02/01 Update... | ||||
|
Added new fan: |
||||
|

|
Heatsink Installation Tips Most heatsinks come with a strip of thermal tape pre-attached to the underside which serves as an interface between the CPU and the heatsink. This thermal tape melts on first use, and fills the tiny irregularities of the heatsink surface, resulting in better heat-transfer from the CPU to the heatsink. While the thermal tape is very easy to apply, it is not a very good conductor. Many tests have shown thermal tape to be not much better than using no interface material. A better alternative to thermal tape is thermal grease. Thermal grease is usually a silicon based grease mixed with some metal in liquid form. The cheapest thermal grease contains nickel-oxide, and has a thermal conductivity ten times greater than that of thermal tape (nickel-oxide thermal grease can be found at your local Radio-Shack). Not all thermal grease is created equal. Arctic Silver thermal compound is made of silver instead of Nickel. Since Silver is a much better conductor than Nickel, the thermal conductivity of the silver compound is much high. Unfortunately, because silver is also a precious metal, the price is considerably higher. You absolutely MUST apply some interface between the heatsink and the CPU. No matter which one you decide upon, be sure to apply a very thin layer, as less is better. Remember that you are only trying to fill the microscopic irregularities which result from machining the heatsink. Since the thermal compound almost certainly has less conductivity than the heatsink itself, adding more than what is necessary can actually decrease your overall conductivity. Finally, be very careful when applying the heatsink not to apply too much pressure to your CPU. If the heatsink spring seems to be too tight, don't force it. With the heatsink far away from your CPU, bend the spring downward a little bit to ease the tension. Repeat this until the heatsink spring clips on easily but firmly to the socket base. As a last note, on first boot (and perhaps for a couple of days), closely monitor your CPU fan and CPU temperature. If your fan is defective, you will most likely notice it right away. Likewise, if the heatsink has been poorly seated, the signs will be apparent from first boot. |
|
Fan Throughput in a Nutshell A faster fan is not necessarily a better fan. A fan's throughput is measured in CFM, or Cubic-Feet per Minute. Higher RPM (Rotations Per Minute) will almost always increase a fans CFM, however it will also increase the fan's noise-level, measured in dB-A. More important are design-specifics such as number of fins, does it use sleeve-bearings or ball-bearings, what was done to reduce the amount of friction on the various parts of the fan, etc. As an example, let's look at ball-bearing v.s. sleeve-bearing. Ball-bearing fans contain (usually 2) small steel balls inside on which the fan rotates. By rotating against eachother, the balls reduce friction inside the fan allowing it to run faster, cooler and quieter. Sleeve-bearing fans have a similar effect, except that unlike the steel balls, sleeves wear out over time. As the sleeves wear down, friction is increased, and thus the fan gets hotter, slower and noisier. Most ball-bearing fans have a 100,000 hour guarantee, while most sleeve-bearing fans have a 10,000 hour guarantee. So, if your machine is on all the time, the ball-bearing fan will run for about 11½ years, but the sleeve-bearing fan is only guaranteed for just over 1 year! The cheaper models often don't have a guarantee at all. In conclusion, look around before you decide on the fans for both your CPU and your chassis. Don't look at RPMs, but rather compare throughput in CFMs to size and noise-level (dB-A). And, finally, always choose ball-bearing over sleeve-bearing if possible, as the price difference is usually not more than $2-3 USD. |
|
|