CGS4854 Assignment 4
Due Tuesday, 3/10 at 1 pm.
If you had any errors in Homework 3, then fix them, so that you don't lose
points twice for the same mistake.
Apache
Start your Apache server.
-
Create a subdirectory of
docRoot named errors.
-
Add an HTML page for 403 errors to this directory.
-
Add an HTML page for 404 errors to this directory.
-
Configure Apache so that it uses your error pages for 403 and 404 errors.
-
Add the following to the
index.html page in the
docRoot folder.
-
Create a link to a file that does not exist.
-
Create a link to a file named
.htaccess. Do not create this
file, just create a link to it. Apache does not allow access to such a file,
even if it doesn't exist.
-
Create a link to the
errors folder.
-
Change some icons on your server.
-
Edit the
srm.conf file and move all the
AddIconByType directives so that they are after all the
AddIcon directives. The first directive that is found is the
one that is used. The AddIconByType are meant to be used as
default icons for a type, so they should be placed after the AddIcon directives,
which are more specific.
-
Access the link
/icons/ on your server. This is the directory
of icons that your server uses. This is a link to a shared folder on ocelot.
-
Open the
icon.sheet.png image. This has thumbnails for all the
images in the directory.
-
Choose some images that you like.
-
Change the image that is used for the parent directory. You will need to
examine the srm.conf file to see which directive is used to set the image
for the parent directory.
-
Change the image that is used for HTML files.
-
Remember to HUP your server after you make changes to the conf files.
Enhanced Controller
Create a new package for this assignment in your username web app. It should
start with the same fields, pages and validations that were required for
Homework 3.
-
Do not change the files that were used for assignment 3.
-
Assignment 3 should still be accessible from the web app.
-
You may copy files from assignment 3 into this new package.
-
You may import files from assignment 3, if they are unchanged.
-
Modify the application so that it implements all the features from Chapter
4. Review the steps in Tutorial 4.
-
Add all the necessary files to the
shared package.
-
Note that
HellperBaseCh4 should be placed in the
shared package.
-
Add all the necessary JAR files to the Libraries folder.
-
Set up the log file properly.
-
Create the
error.log file in the WEB-INF -> logs
folder.
-
Edit
web.xml and add the servlet definition for
InitLog4j. Be sure it is called whenever the web app is loaded.
-
Bean
-
Place the bean in the same package as the controller.
-
Start with the bean that was used in Homework 3.
-
Think of a calculation that needs to be done for your site. The calculcation
should include a double and an integer. Think of a calculation that fits
the theme of your site. Some examples might be:
-
cost: price * quantity
-
average price: cost / quantity
-
total grade points: grade points * credits
-
gpa: total grade points / credits
-
total storage: megabytes * disks
-
average storage: total megabytes / disks
-
discount: total price * discout rate
-
shipping cost: total pounds * rate
-
handling fee: items * fee
-
Add a bean property that is a double.
-
This corresponds to the double that is used in your calculation.
-
Provide an appropriate test for validity.
-
Provide an appropriate default value if the data is invalid.
-
Add a bean property that is an int.
-
This corresponds to the integer that is used in your calculation.
-
Provide an appropriate test for validity.
-
Provide an appropriate default value if the data is invalid.
-
Add an accessor that returns a double.
-
There will be no mutator for this property.
-
There will be no variable for this field.
-
The accessor will return the result of the calculation.
-
Controller Helper
-
Use a unique name, other than "helper", to save the controller helper in
the session.
-
Change the name of the
getData method to another name.
-
Write a warning message to the logger every time that the edit method is
called.
-
Write an info message to the logger every time that the copyFromSession method
is called.
-
Write a debug message to the logger every time the process page is called.
-
JSPs
-
There should be no hidden fields in any of the JSPs.
-
The JSPs should be in a hidden directory, but not in the same directory as
the controller. Move the JSPs to an appropriate subdirectory of WEB-INF (not
under classes).
-
Modify all the EL statements so that they refer to the new name that you
used to store the helper in the session.
-
Modify all the EL statements so that they do not use
data, but
use the appropriate name for the new accessor method.
-
Add a new field to the edit page that will hold a double. This field will
correspond to the new bean property that is a double.
-
Add a new field to the edit page that will hold an int. This field will
correspond to the new bean property that is an int.
-
Echo these new fields in the confirm, wish list and process pages.
-
Echo the result of the calculation in the process page. Use the bean property
that only has an accessor.
-
Run the application with different levels for the logger. Change the logger
level in the constructor of the controller helper (do not modify the
HelperBase). Run the application with level set to debug, then
warn, then info, then error. Review the log file after each run. View the
log file in a separate editor, as NetBeans will not re-read the file from
the disk.
-
Be sure there is a hypertext link in the
index.jsp page
to the controller. Use a relative link.
-
The web app must use the secure web.xml file and should only allow
you and me to access your application:
Edit tomcat users
-
Be sure to modify the project so that the .java files are placed in
the WAR file: Configuring WAR File
-
After the app is running in NetBeans, upload it and run it on ocelot:
Uploading a WAR file
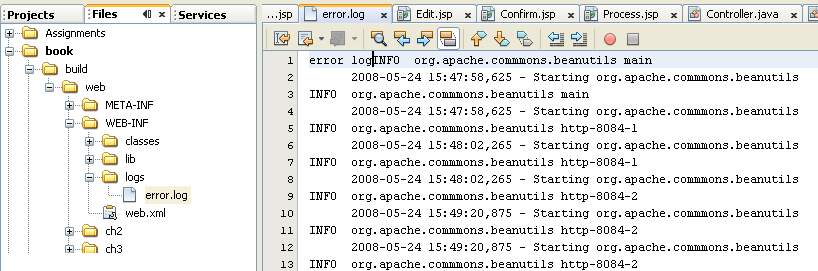
Take a look at your log file, you will see that there are messages in it.
-
Open the Files tab in NetBeans and navigate to
build -> web
    -> WEB-INF -> logs
-
Open the
error.log file. It will look something like this (book
will be replaced by the name of your web application).
ROOT Web Application
Be sure you have the following links in the ROOT/index.jsp file.
-
Relative link to manager/html.
-
Relative link to the root of your web application.
-
Absolute link to your student host using your Apache port.
Submitting the Assignment
Clean and Build your web application. After doing this, navigate to
the WAR file in NetBeans and verify that the .java files are included:
View WAR File
-
Since you are using a log file that is in the web application, you will need
to shut down Tomcat before you can do a Clean and Build.
-
Open the Services (Runtime in 5.5) folder and open the
Servers folder.
-
Right-click the Tomcat server and select Stop.
-
Now you can do a Clean and Build.
In the operating system (not in NetBeans) navigate to the dist folder in
the NetBeans project.
Deploy the WAR file on ocelot:
Deploy a WAR
File
-
After deploying, open the
WEB-INF/logs directory in winscp or
on ocelot.
-
Change the permission of the
error.log file to 606. This will
allow Tomcat to write to the file.
-
Use the manager to stop your web application and then start it again. This
will force it to reread the
web.xml file so that the logger
can be initialized.
-
Access your application and visit all the pages, then verify that some new
messages have been added to the log file.
To hand in the assignment, zip the following directories into one ZIP file
and upload it.
-
Please zip the following. Issue a separate ZIP command for each. All the
files will be added to the same ZIP file.
-
Remove the old zip file.
rm ~/username.zip
-
Please use the following command to compress your
cgs4854/webapps/username folder.
zip -r username ~/cgs4854/webapps/username -x \*.jar \*.zip
	\*.war
Replacing username with your user name. This will create a file named
username.zip. It contains the username web application.
-
Please use the following command to compress your cgs4854/serverRoot
folder.
zip -r username ~/cgs4854/serverRoot -x \*.jar \*.zip \*.war
Replacing username with your user name. This will create a file named
username.zip. It contains the username web application.
-
Please use the following command to compress your cgs4854/docRoot
folder.
zip -r username ~/cgs4854/docRoot -x \*.jar \*.zip \*.war
Replacing username with your user name. This will create a file named
username.zip. It contains the username web application.
-
Check the size of the ZIP file, it should be less than 3 MB. If it is not,
then you probably have another ZIP file stored in the ZIP archive. Delete
it and re-zip.
-
You then have a choice for submitting the file.
-
If you are logged onto ocelot, use my uploading program to upload the file.
Enter this command at the command prompt:
~downeyt/cs/public/webftp/webftp.pl
-
If you are using winscp, then download the zip file to your computer; then,
upload the file to me:
Submitting
homework on-line via the Web.
-
Upload the file as binary.
Be sure that all your files and subdirectories are included in the zip
file.
After uploading, do not modify your files on ocelot until after your assignment
has been graded.