If you did not do a previous Tutorial, then create a web application named Tutorials in NetBeans. Review the web page that contains instructions on creating a servlet in a NetBeans project: Creating a Project in NetBeans
All previous Tutorials should still be able to be accessed and run from the application.
If you had errors in any of the previous tutorials, fix them, so that you do not lose points again for old mistakes.
Implement the Persistent Controller in the Tutorials web application. It must work exactly like the example from Chapter 5 of the book.
log4j-1.2.11.jar (should already be there from Tutorial
4) commons-collections-2.1.1.jar (should already be there
from Tutorial 4) commons-logging-1.0.4.jar (should already be there from
Tutorial 4) commons-beanutils.jar (should already be there from
Tutorial 4) shared package in the Source
Packages folder.
InitLog4j.java (should already be there from Tutorial 4)
HelperBaseCh4.java (should already be there from
Tutorial 4) ButtonMethod.java (should already be there from Tutorial
4) HelperBaseCh5.java HibernateHelper.java PersistentBase.java WebappListener.java Controller.java, and
ControllerHelper.java in the ch5.persistentData
package in the Source Packages folder in NetBeans.
fall10_ prepended to
your ocelot user name. The name of your database is the same as your
mysql user name: fall10_username jdbc:mysql://ocelot.aul.fiu.edu:3306/fall10_username fall10_username RequestDataPersistent.java file
and place it in the ch5.persistentData package.
RequestDataRequired.java, from
the first part of Chapter 5. Id property as is outlined in the book,
PersistentBase. ch5.persistentData package in
the Source Packages folder in NetBeans.
ch4.enhanced controller, but copy
them into the ch5.persistentData package. form method to POST. If you don't do this,
then you will always be stuck on the edit page. Edit.jsp file so that it will display any
errors generated by the validation of the Hobby and
Aversion. id, hobby and
aversion for each row in the table. Place the data
from each row on a separate line. forEach loop to iterate through the rows
in the table. You will need to add the taglib statement that
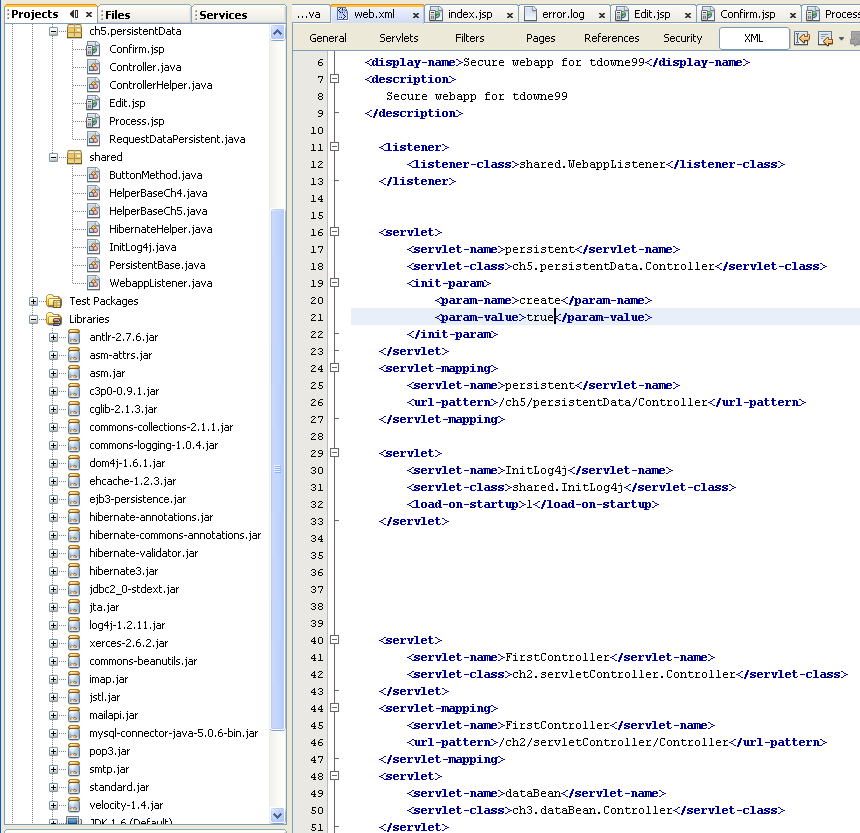
includes the JSTL in the JSP. /ch5/persistentData/Controller. create initialization parameter to the servlet
definition.
true, to create the table the first
time you run the servlet. false,
so that your data will not be lost the next time Tomcat restarts.
listener tag so that the
WebappListener will close resources when Tomcat shuts
down. When you are done with everything, your directory and file structure should
look like this.
Take a look at your log file, you will see that there are messages in it.
build ->
web -> WEB-INF -> logs error.log file. It will look something like
this.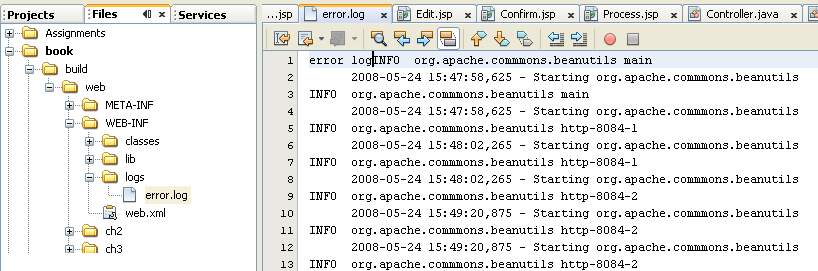
Connecting to a database for the first time can be frustrating. Most of the time, the problem is with the username and password for mysql.
mysql -h ocelot.aul.fiu.edu -u fall10_username -p <Enter Key>exit; to disconnect. fall10_username. jdbc:mysql://ocelot.aul.fiu.edu:3306/fall10_username Before you submit your homework, be sure that you have set the
create parameter in the web.xml file to false.
Be sure that your NetBeans project is configured so that .java files are added to the WAR file: Adding .java files to a WAR file
Clean and Build your web application. After doing this, navigate to the WAR file in NetBeans and verify that the .java files are included: View WAR File
In the operating system (not in NetBeans) navigate to the dist folder in the NetBeans project.
Deploy the WAR file on ocelot: Deploy a WAR File
WEB-INF/logs directory in winscp
or on ocelot. error.log file to 606 and
restart the web app from your manager. This will allow Tomcat to write to
the file. The WAR file is too big for you to submit to me. To hand in the tutorial, zip the Tutorials web app directory and upload it. If your web app is named something other than Tutorials, then use that name in the zip command.
rm username.zip zip -r username ~/cgs4854/webapps/Tutorials -x \*.jar \*.zip \*.war
\*.jpg \*.png \*.gif ~downeyt/cs/public/webftp/webftp.pl