U: drive, do not create the project in the
webapps folder. I suggest that you create a folder named
local in the cgs4854 directory, and place your
projects there.)
Download Netbeans to your local computer. Be sure to download a version of Netbeans that includes Tomcat. The labs are still using NetBeans 8.2, so that is the one I recommend that you download to your computer. NetBeans is transitioning from Oracle to Apache. For now, we will stay with the last, stable, Oracle release.
If you have already installed Netbeans and did not install the Web version or the full version, then download either of those versions and reinstall. Netbeans will upgrade your current installation.
In order to work on a file in NetBeans, it is necessary to create a project.
U: drive, do not create the project in the
webapps folder. I suggest that you create a folder named
local in the cgs4854 directory, and place your
projects there.)
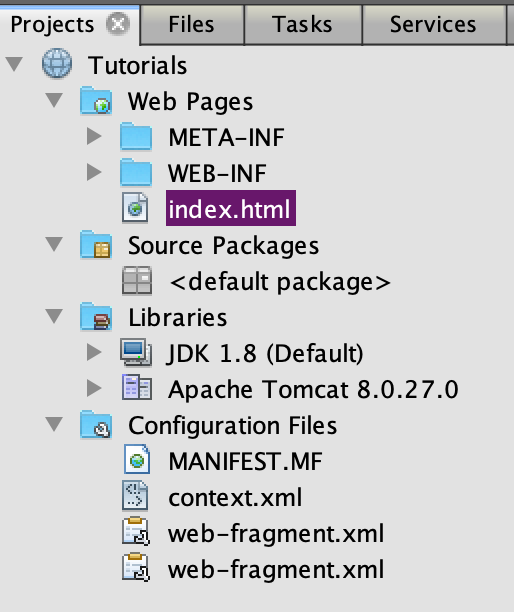
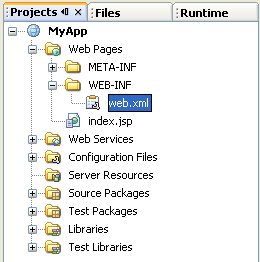
A Web Project in NetBeans is set of directories and files that allow for servlets and JSPs to be executed and debugged.
META-INF
context.xml file that defines the URL that
is used to access this application.
WEB-INF
web.xml file that defines many aspects of
the web application, including the URLs to access servlets.
index.jsp or index.html
.html
and some use .jsp. Use whichever file has been created for you.
All servlets for this course should be contained in a package.
Right-click on Source Packages and select New, then select Java Package.
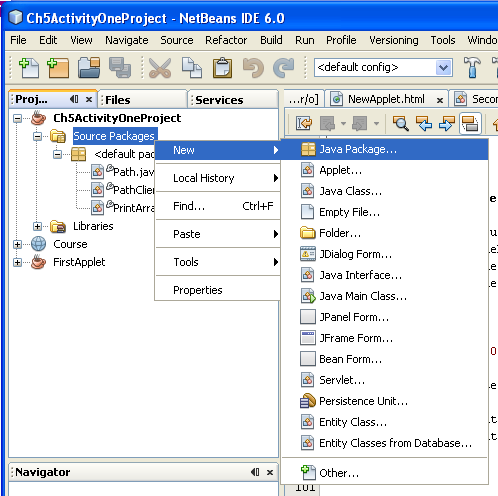
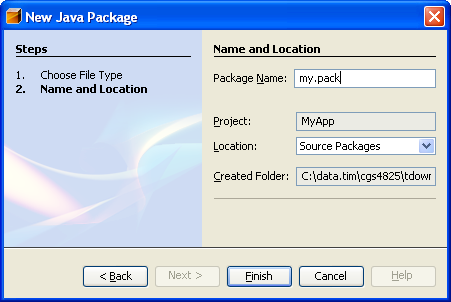
Type in the full name of the Java package, for instance my.pack, then click Finish.
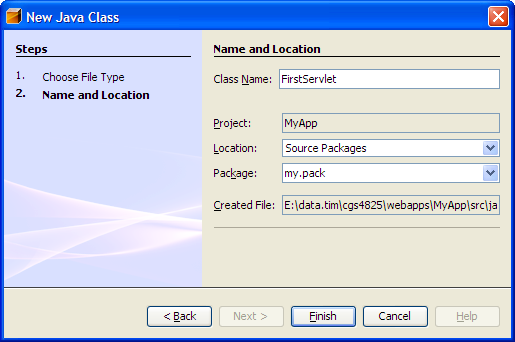
Right click on the new package and create a new class.
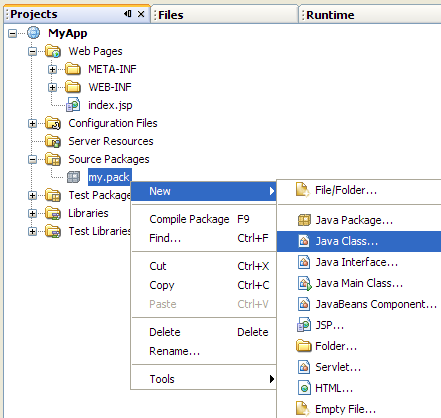
Name it FirstServlet.
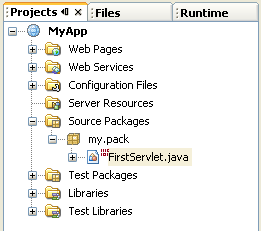
After completing these steps, you can see the servlet in the Source Packages folder.
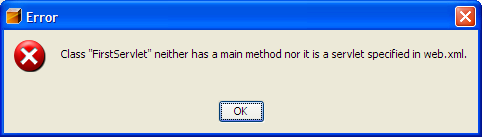
If you right-click the servlet in the file tree, and select Run, you will get this error:
Newer versions of NetBeans do not add a web.xml to the web application, automatically. To add a web.xml to your web app, select File -> New File -> Web -> Standard Deployment Descriptor (web.xml).
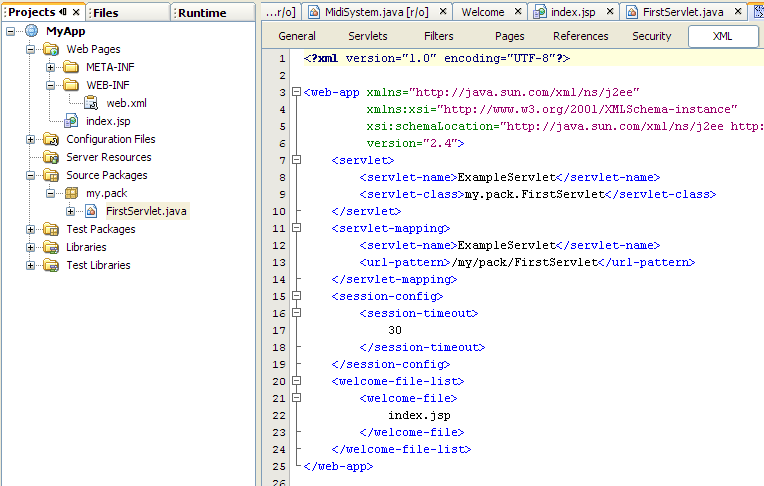
The solution is to add a servlet mapping for this servlet to the web.xml
file. I like
to use a url-pattern that is the same as the full name of the class, replacing
each period with a slash. For instance, if the class is
my.pack.FirstServlet then define the URL as
/my/pack/FirstServlet. Notice that the servlet-name tag does not
have to agree with the actual name of the servlet.
    <servlet>
        <servlet-name>ExampleServlet</servlet-name>
        <servlet-class>my.pack.FirstServlet</servlet-class>
    </servlet>
    <servlet-mapping>
        <servlet-name>ExampleServlet</servlet-name>
        <url-pattern>/my/pack/FirstServlet</url-pattern>
    </servlet-mapping>
Open the web.xml file. There are many ways to view the contents of the web.xml file, click the XML tab above the edit window to view the XML source.
Define the servlet and servlet-mapping tags.
If you try to run the servlet and get a log in screen for the manager, then you will need to set the username and password for the manager. Do this from the Tools -> Server Manager menu (Tools -> Servers in NetBeans 6.0).
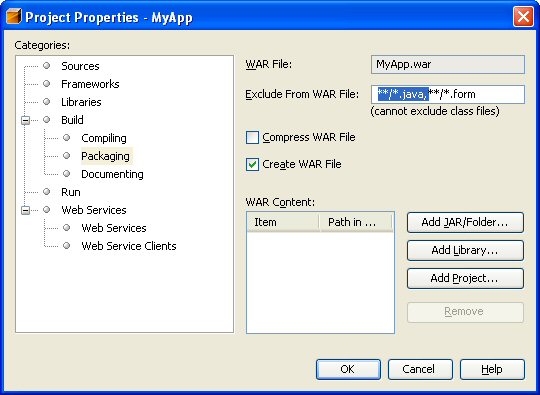
By default, the .java files are not added to the WAR file. To have them added to the WAR file when the project is built, right-click on the name of the project in the project window and select properties.
From the properties screen, select Build -> Packaging. Edit the Exclude
From WAR File box and remove **/*.java,.
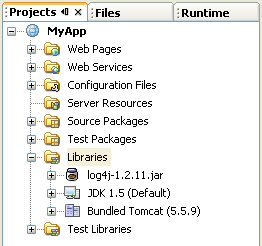
Later in the course, additional features will be added to a web application by using jar files. Download the jar file to your system, then right-click the Libraries folder and select Add JAR/Folder....
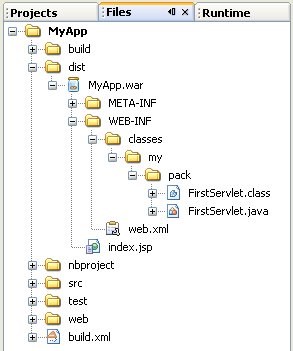
A Project in NetBeans is an abstraction of a web application. The actual
directory and file structure is in the location that was specified when the
application was created. However, not all of the directories are visible
from the project view, but they are visible from the Files view.
The web directory contains the actual web application directory for your project.
The src files are located in the src directory.
The .class files for your servlets are located in the build directory. Open the web sub-directory of build. In the WEB-INF is located the classes directory, which contains the .class files for the servlets.
Whenever the project is cleaned and built (select Clean and Build from the Build menu), a Web Archive (WAR) file is created. This WAR file is actually a ZIP file that contains the web application. The WAR file contains a web application that has a standard format. The WAR file is located under the Files tab in the dist folder.