Project 1 - Basic Mote Programming
 The purpose of this assignment is to become familiar with programming
on MICAz motes and to introduce you to programming sensor networks using
the TinyOS operating system and nesC programming language.
This assignment involves reading through a TinyOS
tutorial, uploading and testing an existing mote application, and
applying and testing minor changes to the mote application.
The purpose of this assignment is to become familiar with programming
on MICAz motes and to introduce you to programming sensor networks using
the TinyOS operating system and nesC programming language.
This assignment involves reading through a TinyOS
tutorial, uploading and testing an existing mote application, and
applying and testing minor changes to the mote application.
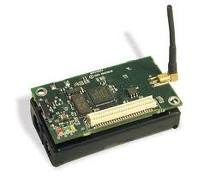
In this assignment, you will require two MICAz motes (radios), one of which will serve as the base station unit connected to one of the computers in the DARTS Lab. The second mote will be connected to a MTS300/310 multi sensor board that combines a light sensor, temperature sensor, microphone, sounder, 2-axis accelerometer, and 2-axis magnetometer. The base station mote connects to the computer via a "mote interface board MIB510", which uses a serial connection to communicate with the computer. The motes have an on board flash that can be programmed.
To complete this assignment, follow the steps outlined below.
Step 1: Read the tutorial and run sample applications.
This online tutorial provides a great first introduction into mote programming. However, note that it focuses on TinyOS version 1.1. A more recent (but somewhat different) tutorial can also be found here. Read the first 4 lessons of both tutorials and upload applications 1 and 4 of the first tutorial onto the motes. Note that there are 4 desktops in the DARTS Lab (named darts[1..4].cse.nd.edu), which can be used for this assignment (access information to the lab will be provided by the TA during the in-class TinyOS tutorial). Each desktop has already one mote connected via the interface board (this mote is the base station mote). Additional motes can be found in a box on the coffee table in the lab. You will need one of these additional motes for this assignment. Once you have completed working on the mote for the day, please erase any code you loaded onto them and return them to the box (note: do not remove the mote connected to the programming board and PC). During programming, the red and green LEDs on the mote should blink. Once programming has completed, the red LED should blink on and off, indicating that you correctly programmed the device.
Step 2: Extend the Blink application.
The "Exercises" section of the 1st lesson of the tutorial proposes an extension to the Blink program; implement and test this extension. As a second extension, change your code to also access the light sensor and change Blink such that the LED that is used for blinking depends on the current light reading. That is, if the reading is below a certain threshold (when it is dark), the green LED should be blinking. If the reading is above a certain threshold (room is fully lit), the red LED should be blinking. When between the two thresholds, the yellow LED should be blinking. In addition, the mote must report the light readings back to the base station mote and the desktop computer where it is being printed in a terminal.
Deliverables
- All source files that have been modified must be placed into your dropbox into a subdirectory called "project1".
- A brief report (at most one page) describing the modifications made, any challenges faced in the implementation and testing, and any unresolved issues.
- You will briefly meet with the TA on 9/17 in his TA hour to demonstrate your application (a signup sheet will be handed out during class). The TA may ask questions to see how familiar you are with the code and TinyOS/nesC.